In today’s busy world, keeping our living spaces organized has honestly become more important than ever. One pretty cool way to do that—blending creativity with practicality—is by making your own Cardboard Drawer Box. It’s not just a handy storage thing, but also super customizable. Whether you need a spot for your home office stuff, craft supplies, or even kids’ toys, this project can be tailored to fit just about anything.
Making a cardboard drawer box is actually pretty doable and eco-friendly—you don’t need to be a pro. With a few simple materials and some easy steps, you can turn plain old cardboard into a stylish, functional storage piece. Plus, it’s a great way to clear up clutter and tap into your creative side at the same time.
Whether you’re trying to tidy up your desk, come up with a fun storage solution for the kids, or just want to try out some DIY skills, this little guide will walk you through it. So, get ready to jump into the world of DIY, and see how a simple cardboard drawer box can make your space more organized—and maybe even inspire some creative sparks along the way!
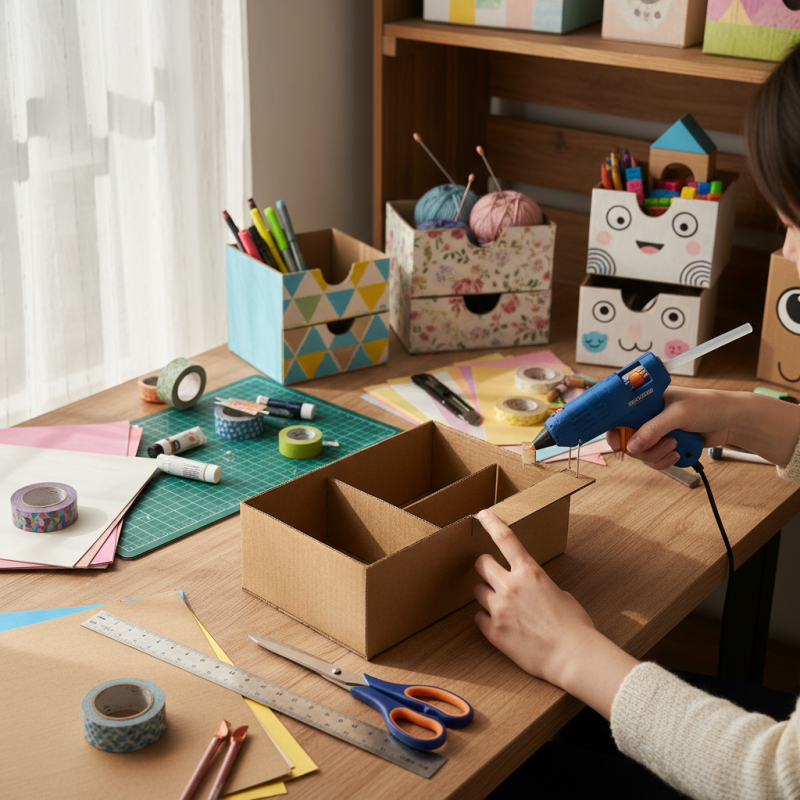
Materials Needed for Crafting a Cardboard Drawer Box
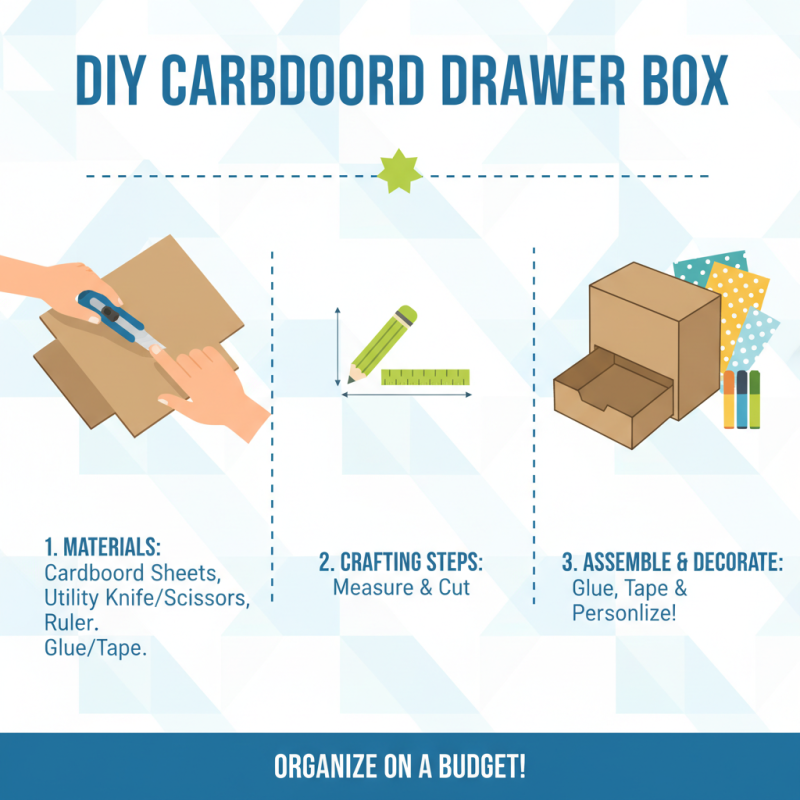
Creating a cardboard drawer box is a fun and practical way to organize your space without spending much money. To start crafting your own drawer box, you will need several basic materials that can easily be found at home or in craft stores. The primary materials include cardboard sheets, a sharp utility knife or scissors for cutting, a ruler for precise measurements, and glue or tape to secure the box structure. Additionally, you might want markers or decorative paper to personalize your drawer box and make it more visually appealing.
According to a report by the Paper and Paperboard Packaging Environmental Council (PPEC), cardboard is one of the most recyclable materials and has a recycling rate of approximately 89.5% in the United States. This means that while you’re creating functional storage solutions, you’re also engaging in a sustainable practice beneficial to the environment. Furthermore, using cardboard for DIY projects can significantly contribute to reducing waste, as over 400 million tons of cardboard are produced globally each year. By repurposing cardboard, you’re helping to minimize your environmental footprint while also indulging in a creative activity that can enhance your organizing skills at home.
Step-by-Step Instructions for Cutting Cardboard Pieces
Creating a cardboard drawer box at home can be both a practical and eco-friendly DIY project. According to a report by the American Institute of Architects, the average household generates approximately 1.5 tons of waste per year, with cardboard comprising a significant portion. By utilizing cardboard for storage solutions, we not only repurpose materials but also contribute to waste reduction efforts. The first step in making a drawer box involves measuring and cutting cardboard pieces accurately.
To ensure your drawer box is functional and aesthetically pleasing, you’ll need to begin with precise measurements. A simple design typically requires a base, four sides, and a front panel. For instance, if you want a box that is 12 inches wide, 10 inches deep, and 6 inches high, measure and cut your cardboard into the following dimensions: one piece at 12” x 10” for the bottom, two pieces at 12” x 6” for the sides, two pieces at 10” x 6” for the front and back, and an additional piece for the front panel if you wish to create a closed drawer. Always use a sharp utility knife on a cutting mat for clean cuts, and consider reinforcing corners with glue or tape for added stability.
Once your pieces are cut, assemble them starting from the bottom up. It is crucial to attach the side panels to the base first, followed by the front and back panels. Data from the Environmental Protection Agency indicates that up to 75% of the material in the average landfill is recyclable, highlighting the importance of projects like these. By investing time in creating a cardboard drawer box, you're not only decluttering your space but also promoting sustainable practices in your home.
Techniques for Assembling the Drawer Structure
Building a cardboard drawer box at home can be a straightforward and enjoyable project. To begin with, gather your materials: sturdy cardboard sheets, a ruler, a pencil, and a cutting tool. First, measure and mark the dimensions for the base, sides, back, and front of the drawer. It's important to ensure that the pieces will fit together snugly for stability. Once measured, carefully cut out the pieces, making sure to maintain clean edges for a better assembly process.
When it comes to assembling the drawer structure, start with the base. This will serve as the foundation for the sides. Use a strong adhesive or double-sided tape to secure the sides to the base at right angles. Next, attach the back piece, ensuring it aligns perfectly with the edges of the base and sides. Finally, complete the structure by attaching the front piece, which can also be designed to include a handle if desired. For additional support, you can reinforce the corners with extra strips of cardboard, providing added durability to your drawer box. This simple construction method allows for customization in size and design, making it perfect for organizing various items around the home.
Tips for Reinforcing and Decorating the Drawer Box
Creating a cardboard drawer box at home can be a fun and practical project, but ensuring that it’s both functional and aesthetically pleasing requires some attention to reinforcement and decoration. According to a recent report by the Association of Home and DIY, over 60% of DIY enthusiasts prioritize functionality without compromising on design when creating home storage solutions. This highlights the importance of taking steps to reinforce your drawer box while also considering its decorative aspects.
To reinforce your cardboard drawer box, consider adding additional layers of cardboard to the sides and base. A study published in the Journal of Materials and Design found that multi-layer configurations can significantly increase the strength of cardboard constructions. Additionally, using hot glue to secure the joints will provide extra stability. You may also want to incorporate wooden or plastic supports if you plan to store heavier items, ensuring that your cardboard box withstands wear over time.
For decoration, use colorful contact paper or paint to give your drawer box a personal touch. Adding decorative elements such as washi tape or stencils can also enhance its visual appeal. The Crafts Council reported that over 75% of consumers are influenced by aesthetics when choosing storage solutions. Personalizing your drawer box not only makes it functional but also transforms it into a piece of decor that complements your home environment.
Ideas for Customizing the Box for Different Uses
Customizing a cardboard drawer box can transform a simple storage solution into a tailored organizer that meets various needs. One creative idea is to decorate the exterior with washi tape or paint in your favorite colors, making it not only functional but also visually appealing. For a kid's room, consider adding fun stickers or stencils featuring their favorite characters. This personalized touch can encourage children to keep their items organized while also expressing their unique style.
For a more practical approach, you can customize the interior compartments of the drawer box. This might involve cutting additional pieces of cardboard to create dividers, allowing you to sort small items like office supplies, crafting materials, or even kitchen utensils. Labeling each section with a marker or printed tags can enhance functionality and help you find what you need quickly. Whether you need a place for jewelry, craft supplies, or miscellaneous items, a cardboard drawer box can be adapted to your specific requirements, making it an excellent addition to any space in your home.
Common Mistakes to Avoid When Making a Drawer Box
When creating a cardboard drawer box, it’s easy to get caught up in the excitement of the project and overlook critical details. One common mistake is underestimating the importance of measurements. Ensuring that all dimensions are precise is vital for the drawer to function properly within its designated space. Using a ruler consistently and double-checking every measurement can save time and frustration later on. Additionally, not accounting for the thickness of cardboard when cutting pieces can lead to misfits, resulting in a box that doesn’t close properly or has structural weaknesses.
Another mistake many make is neglecting to reinforce the joints and corners. Cardboard, while versatile, can be flimsy if not supported correctly. Skipping this step may lead to a box that collapses under minimal weight or usage. Using glue or tape strategically at these points will help bolster the overall sturdiness of the drawer. Finally, choosing inappropriate cardboard can also contribute to issues down the line. Opting for lighter weight cardboard may seem practical for ease of handling, but it typically lacks the durability needed for a functional drawer. Selecting a medium to heavy-duty cardboard ensures that your creation can withstand daily use without falling apart.
How to Make a Cardboard Drawer Box Easily at Home for Any Purpose - Common Mistakes to Avoid When Making a Drawer Box
| Dimension | Value | Common Mistakes |
| Material | Cardboard | Using weak cardboard |
| Size of Box | 30 x 20 x 15 cm | Not measuring correctly |
| Drawer Slides | Wooden dowels | Skipping support for slides |
| Glue Type | PVA glue | Using the wrong glue |
| Finishing Touches | Paint & Varnish | Skipping surface treatment |
Optional Additions for Enhanced Functionality and Aesthetics
When creating a cardboard drawer box at home, think about optional additions that can enhance both its functionality and aesthetics. For instance, incorporating dividers into your design can help organize items efficiently. These dividers can be simply made from additional cardboard pieces, cut to size, and glued or taped into the drawer. This method not only maximizes the use of space but also keeps everything neatly arranged, making it easy to find what you need.
To elevate the visual appeal of your drawer box, consider applying decorative elements such as wrapping paper, paint, or fabric. A colorful outer layer or fun patterns can instantly transform a plain cardboard box into a stylish storage solution that complements your decor. Alternatively, adding labels can help identify the contents, making it even more functional.
Tip: Before decorating, ensure the surface of your cardboard is smooth and clean to allow for better adhesion of paints or paper. Additionally, using a sealant can protect your decorations, extending the life of your cardboard drawer box while maintaining its look.
Elevate Your Gifting Experience with Customized Magnetic Foldable Gift Boxes: The Perfect Blend of Style and Functionality
Elevate your gifting experience with the exquisite charm of customized magnetic foldable gift boxes, where style meets functionality in the most captivating manner. The minimalist design, wrapped in a pure white cardboard shell, exudes a sense of luxury that is further enhanced by the vibrant yellow satin lining. This striking contrast not only provides an eye-catching aesthetic but also ensures that your gifts are presented in an elegantly crafted package that leaves a lasting impression.
As you open the sleek rectangular box, the silky lining greets you with an air of sophistication, making every unboxing an experience in itself. The delicate engraving on the inside of the box lid, which reads "La maison vous remercie" in a graceful handwritten font, adds a personal touch that highlights the bespoke nature of the packaging. This attention to detail reflects a commitment to quality and elegance, allowing the recipient to feel valued and appreciated. Such customized gift boxes not only serve as a protective enclosure for your treasured items but also as a statement piece that embodies a low-key yet exquisite brand style.
FAQS
: You will need sturdy cardboard sheets, a ruler, a pencil, and a cutting tool.
Start by measuring and marking the dimensions for the base, sides, back, and front of the drawer. Ensure the pieces will fit together snugly for stability.
Begin with the base, which serves as the foundation. Use strong adhesive or double-sided tape to secure the sides to the base at right angles.
You can reinforce your drawer box by adding additional layers of cardboard to the sides and base and using hot glue to secure the joints. Incorporating wooden or plastic supports is also recommended for heavier items.
You can use colorful contact paper or paint, and add decorative elements like washi tape or stencils to enhance its visual appeal.
Consider cutting additional pieces of cardboard to create dividers, allowing you to sort small items. Labeling each section with tags can also enhance organization.
Personalizing your drawer box not only makes it functional but also turns it into a decorative piece that complements your home environment.
Yes, the drawer box can be customized to meet various needs, whether for organizing office supplies, craft materials, or even kitchen utensils.
Add fun stickers or stencils featuring their favorite characters to the drawer box, making it more appealing and encouraging them to keep items organized.
Aesthetics can influence consumer choices, and prioritizing both function and design makes your storage solution not only practical but also visually pleasing in your living space.
Conclusion
Creating a Cardboard Drawer Box at home can be a fun and rewarding project that serves various practical purposes. To start, gather necessary materials such as cardboard, scissors, tape, and decorations. Follow the step-by-step instructions to cut cardboard pieces accurately and assemble them into a sturdy drawer structure. Use techniques that enhance the box's durability, and don’t forget to apply tips for decorating it based on your style.
Additionally, consider customizing your Cardboard Drawer Box for specific uses, whether for organizing office supplies, crafting materials, or even as part of your home decor. Be aware of common mistakes to avoid during the crafting process to ensure a successful outcome. You can also explore optional additions that can improve both functionality and aesthetics, making your cardboard creation even more versatile and appealing.